Difference between revisions of "Electron Tomography"

From EosPedia
Jump to: navigation, search
(3D Reconstruction)
(Example1 (Reconstruction of 1 axis tilt))
Line 304: Line 304:
 
===[[mrc2Dto3D]]===
 
===[[mrc2Dto3D]]===
 
====Example1 (Reconstruction of 1 axis tilt)====
 
====Example1 (Reconstruction of 1 axis tilt)====
<div> 連続傾斜像の撮影で軸にズレがない場合は角度刻みをそのままInput fileリストにSettingします.</div>
+
<div> If the tilt axis don't deviate, set the angle information directly to input file list.</div>
 
<br>
 
<br>
  
Line 311: Line 311:
 
<tr>  
 
<tr>  
 
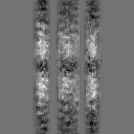
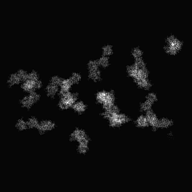
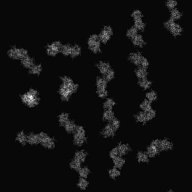
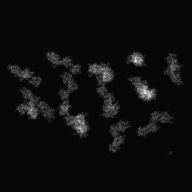
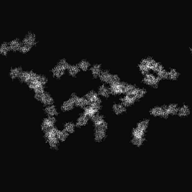
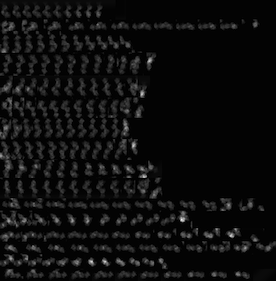
<td><p align="Center">[[File:1WDC-Tom-Fit-2d.png]]<br>
 
<td><p align="Center">[[File:1WDC-Tom-Fit-2d.png]]<br>
10°刻みで表示<br></p>  
+
10° interval<br></p>  
 
</td>  
 
</td>  
 
</tr>  
 
</tr>  
Line 317: Line 317:
 
<br>
 
<br>
  
<div>コマンド: [[mrc2Dto3D]] -i Input.3dlst -o Input.3d -m 1</div>
+
<div>Command: [[mrc2Dto3D]] -i Input.3dlst -o Input.3d -m 1</div>
 
<br>
 
<br>
  
<div>[[Media:Makefile-Tomogram.zip|こちらのMakefile]]を使用すれば,以下のコマンドでも実行できます.</div>
+
<div>By using [[Media:Makefile-Tomogram.zip|This Makefile]], perform the following command for reconstruction.</div>
<div>Setting内容</div>
+
<div>Setting data</div>
 
<pre>
 
<pre>
 
# For Reconstruction
 
# For Reconstruction

Revision as of 06:50, 26 September 2014

Electron Tomography is one of 3D Reconstruction using electron microscope. It is the method that reconstruct 3D image by electron micrographs which is projected the same photo field for several angle, then it creates Tomogram by using computer.

 In the following, describe its method in order.

take tilt-series images

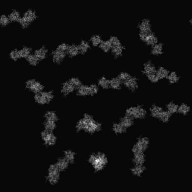
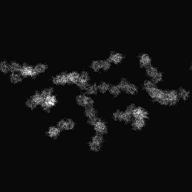
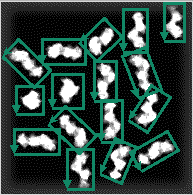
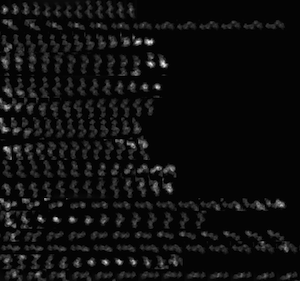
 When sample is taken by this method, image that is tilted at a regular interval around an axis is made. As tilt angle increases, the photo field become wider, thus objects in image come around to the center gradually.


Input-Tomogram1.png

1 Axis Tilt(Center is 0°'s image)


When you will take 2 Axis Tilt 's image, rotate the sample 90 degree, and take as well as 1 Axis Tilt.
Input-Tomogram2.png

2 Axis Tilt(Center is 0°'s image)(as 90° rotation image for 1 Axis Tilt's image)


Image Correction

 Tilt-series image's defocus is larger than normal electron photograph's one, because it is taken as whole field is underfocus. In this case, CTF Correction is not required, because outside data of 1st thon ring don't have almost information if you use electron gun as LaB6. But, in the case of using field-emission electron gun (FEG), note that you might get a incorrect data.

Rough Alignment

 Align roughly each tilt image by using the correlation among images around center.

Input file(rotation at range: ±60°, interval: 2°, around Y-axis)

1WDC-Tom-2dSet.png
10° interval


Preprocess(Windowing)

 By Windowing, remove noise of edge of image.


Windowing of this time is x: 80%, y: 90%
Command(In the case of 1st image): mrcImageWindowing -i Set1000.roi -o Set1000.mask -W 0.2 0.2 0.1 0.1


When you use This Makefile, it performs for all roi file.
Setting data
# For Windowing
WIN_X=0.2
WIN_X_MAX=0.2
WIN_Y=0.1
WIN_Y_MAX=0.1
WIN_MODE=18
Command
make Windowing


Output file(.mask)

1WDC-Tom-mask-2dSet.png
10° interval


Alignment

 Because objects move parallelly depending on tilt angle, align about it. Now, align among the images whose angle is close to each other so as not to be affected by tilt.

e.g. case of images whose interval is 2 degree
 Align 2° image to 0° image.
 Align 4° image to Aligned 2° image.
 Align 6° image to Aligned 4° image.
 .
 .

 (Align "-" as well as "+")


case of using mrcImageCorrelation

 Perform alignment by using This Makefile. Even if you don't use the Makefile, you perform command sequentially, and you can align. But, Input file list for mrc2Dto3D is required to be created.


Example 1
Input file

1WDC-Tom-mask-2dSet.png
10° interval


Command
make CorFit1


1WDC-Tom-Fit-2d.png
10° interval


Fine Alignment

 Align the position and the angle of tilt axis as possible.


Example 1(Alignment of tilt axis)

 Calculate tilt of axis by using mrcImageTiltAxisSearch.


Input file(1 axis tilt data whose axis is tilted by 10 degree)

1WDC-Tom-Tilt-2dSet.png
10° interval


Used Makefile's Setting
# RotMode
ROTMODE=ZOYS
# Rot1
ROT1MIN=10
ROT1MAX=10
ROT1D=10
# Rot2
ROT2MIN=-60
ROT2MAX=60
ROT2D=2
# Rot3
ROT3MIN=0
ROT3MAX=0
ROT3D=30
### For mrcImageMove
SHIFT2MAX=10
SHIFT3MAX=0
### For mrcImageTiltAxisSearch
TILTMIN=0
TILTMAX=20
TILTN=10
TILTITER=1
TILTSCALE=5


Command
make TiltFit


Output of axis tilt(It is stored at .tiltinfofile)
9.895


difference about 3D Reconstruction
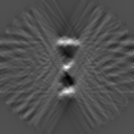
Before correction
Outdata-Tomogram4.png Outdata1-Tomogram4.png Outdata2-Tomogram4.png
After correction
Outdata-Tomogram5.png Outdata1-Tomogram5.png Outdata2-Tomogram5.png
xy-plane yz-plane zx-plane


Example2(Repeatedly Alignment of tilt axis)

Repeat to use mrcImageTiltAxisSearch, referring tilt of output axis.


Input file(1 axis tilt data whose axis is tilted by 1 degree)

1WDC-Tom-Tilt1-2dSet.png
10° interval


Used Makefile's Setting
# For mrcImageTiltAxisSearch
IN_TILT_EXT=roi
# RotMode
ROTMODE=ZEYR
# Rot1
ROT1MIN=1
ROT1MAX=1
ROT1D=1
# Rot2
ROT2MIN=-60
ROT2MAX=60
ROT2D=10
# Rot3
ROT3MIN=0
ROT3MAX=0
ROT3D=10
### For mrcImageTiltAxisSearch
TILTMIN=-10
TILTMAX=10
TILTN=10
TILTITER=100
TILTSCALE=5


Command
make TiltFit


transition of tilt of axis
0.084
0.161
0.230
0.294
0.345

...

0.701
0.700
0.685
0.706
0.701
The tilt of axis approaches gradually 1.


3D Reconstruction

 Reconstruct 3D image from 2D image set.


1WDC-shift1-3d.png
xy-plane

1WDC-shift1-3d2.png
yz-plane

1WDC-shift1-3d3.png
zx-plane

Min

Max
Mean
SD

SE

0 (0, 0, 0)

4 (31, 26, 26)
0.0116844
0.147033

0.000287174


mrc2Dto3D

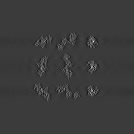
Example1 (Reconstruction of 1 axis tilt)

 If the tilt axis don't deviate, set the angle information directly to input file list.


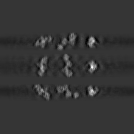
Input file

1WDC-Tom-Fit-2d.png
10° interval


Command: mrc2Dto3D -i Input.3dlst -o Input.3d -m 1


By using This Makefile, perform the following command for reconstruction.
Setting data
# For Reconstruction
IN_3D_EXT=fit
# RotMode
ROTMODE=YOYS
# Rot1
ROT1MIN=-60
ROT1MAX=60
ROT1D=2
# Rot2
ROT2MIN=0
ROT2MAX=0
# Rot3
ROT3MIN=0
ROT3MAX=0
コマンド
make 3DList
make Input.3d


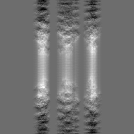
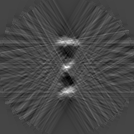
Output file(Input.3d)

Outdata-mrc2Dto3D.png
xy-plane

Outdata1-mrc2Dto3D.png
yz-plane

Outdata2-mrc2Dto3D.png
zx-plane

Min

Max
Mean
SD

SE

-0.00437076 (39, 34, 36)

0.00799233 (37, 34, 36)
3.45089e-06
0.000342836

6.69601e-07


実行例2(2軸傾斜での再構成)

2軸で傾斜した画像にて3次元再構成を行います.
Input file(X, Y-axis周りに±60°の範囲でそれぞれ10°刻みで傾斜)

1WDC-Tom1-2dSet.png
1行目がX-axis傾斜,2行目がY-axis傾斜


こちらのMakefileを使って3次元再構成を行います.
コマンド
make all


途中で使用する範囲を決めるためにDisplay2が起動しますが,今回は全ての範囲を選択してROIInformationを保存します.
今回OutputしたInformationfile
DataA_006.mrcsmth-0000.roi Rect        0.000000       0.000000       63.000000       0.000000       63.000000       63.000000        0.000000       63.000000


Output file

Outdata-Tomogram2.png
xy-plane

Outdata1-Tomogram2.png
yz-plane

Outdata2-Tomogram2.png
zx-plane

Min

Max
Mean
SD

SE

-9.32199 (29, 37, 34)

21.995 (40, 35, 32)
0.0280746
1.38771

0.00271036


実行例3(Doubleを使用した2軸傾斜での再構成)

mrc2Dto3DのOption -Doubleを使用して3次元再構成を行います.


変更箇所
.roilst.mrc3d:
#	mrc2Dto3D -I $*.roilst -o $*.mrc3d -single 0 -InterpolationMode 2 -m 1 
	mrc2Dto3D -I $*.roilst -o $*.mrc3d -Double -InterpolationMode 2 -m 1 


Output file

Outdata-Tomogram6.png
xy-plane

Outdata1-Tomogram6.png
yz-plane

Outdata2-Tomogram6.png
zx-plane

Min

Max
Mean
SD

SE

-10360.9 (41, 24, 0)

8132.05 (40, 35, 31)
86.0574
673.594

1.31561


ラドン変換を使った3次元再構成

 mrc2Dto3Dを使用するほかにラドン変換から3次元像を作る方法があります.ラドン変換は以下の流れで行います.


位置合わせ済みの2Dリスト
mrcImageSinogramCreate
Sinogramリスト
mrcRadon2Dto3D
3Dラドンfile
mrcImageInverseRadonTransform

3Dfile(完了)


実行例1


コマンド
make Radon3D
Output file
xy-plane yz-plane zx-plane
Outdata-Tomogram3.png Outdata1-Tomogram3.png Outdata2-Tomogram3.png

Min

Max
Mean
SD

SE

1.84923e+06 (0, 59, 28)

1.17991e+07 (34, 31, 30)
3.63631e+06
1.64358e+06

3536.42


実行例2

 こちらのMakefileから逆ラドン変換のOptionを変更して実行します.


変更内容
### RadonTransform
RBP_MODE=4
RBP_OPTION=-Rmin 0.05 -Rmax 0.1
コマンド
make Radon3D
Output file
xy-plane yz-plane zx-plane
Outdata-Tomogram7.png Outdata1-Tomogram7.png Outdata2-Tomogram7.png

Min

Max
Mean
SD

SE

-344789 (25, 25, 0)

631546 (37, 34, 28)
4381.1
76358.4

164.297


Problems of Electron Tomography image

ミッシングエリア

 全方位からのProjection像を得られないために,ミッシングエリア(1軸の場合はウェッジ,2軸の場合はピラミッド)とよばれるInformationがない領域があります.そのため,方向依存でのボケを生じます.


元の3次元像(Target.ini3dにリネーム)

Input-ellipsoidal.png
xy-plane

Input1-ellipsoidal.png
yz-plane

Input2-ellipsoidal.png
zx-plane

Min

Max
Mean
SD

SE

0 (0, 0, 0)

2 (29, 29, 14)
0.108302
0.364429

0.000711774


1軸回転でProjectionして3次元再構成した場合(Y-axis: -60° ~ 60°: 10°刻み)
変更箇所
TILTAXISNUMBER=1	# Single: 1 Double: 2 


コマンド
make Target.ini2d
make TestData2DSet
make all


Output-ellipsoidal.png
xy-plane

Output1-ellipsoidal.png
yz-plane

Output2-ellipsoidal.png
zx-plane

Min

Max
Mean
SD

SE

-0.00330818 (52, 36, 32)

0.00425516 (13, 37, 32)
2.08481e-05
0.000467848

9.13766e-07


2軸回転でProjectionして3次元再構成した場合(X, Y-axis: 各-60° ~ 60°: 10°刻み)
変更箇所
TILTAXISNUMBER=2	# Single: 1 Double: 2 
コマンド
make Target.ini2d1
make TestData2DSetDouble
make all


Output3-ellipsoidal.png
xy-plane

Output4-ellipsoidal.png
yz-plane

Output5-ellipsoidal.png
zx-plane

Min

Max
Mean
SD

SE

-0.00248567 (12, 38, 32)

0.00344027 (13, 37, 32)
2.07529e-05
0.000401237

7.83666e-07


画像の位置,フォーカスの問題

 試料を傾けながら撮影するため回転軸からの距離に応じてレンズとの距離が変化していきます.これによって生じる問題をいかに補正するかも一つのポイントとなります.


parallel transformの補正

 傾斜する角度が大きくなるほど,視野が広くなるため試料は傾斜軸の方へ近づいていきます.これを補正するためにmrcImageCorrelationなどを使ってどれだけparallel transformが必要かを計算します.また,試料を傾斜する毎に形も変わっていきますので比較はできるだけ近い画像同士で行います.


軸の決定

 撮影した画像は必ずしもSettingした軸を中心に傾斜しているとは限りません.これは電子顕微鏡自体の性能や試料の設置方法などによって多少のズレが生じてしまうからです.傾斜軸のズレはmrcImageTiltAxisSearchなどを使って計算します.


トモグラフに使われる画像処理

 再構成した3次元画像のAnalysisを行う前処理として以下のような処理を施します.


Smoothing

 再構成した3次元像のNoiseを除去するためSmoothingを行います.


実行例1

Input-Tomogram3D.png
xy-plane

Input1-Tomogram3D.png
yz-plane

Input2-Tomogram3D.png
zx-plane

Min

Max
Mean
SD

SE

-0.00268221 (76, 92, 66)

0.00642324 (89, 42, 71)
2.0386e-06
0.000254286

1.63933e-07


コマンド: mrcImageSmoothing -i Input-Tomogram3D.mrc -o Input-TomogramSmth.mrc -m 1


Input-TomogramSmth.png
xy-plane

Input1-TomogramSmth.png
yz-plane

Input2-TomogramSmth.png
zx-plane

Min

Max
Mean
SD

SE

-0.00136636 (75, 42, 133)

0.00292404 (94, 65, 68)
-9.48921e-07
0.00013513

8.71152e-08


セグメンテーション

 2次元画像や3次元画像を必要な部分ごとに切り出します.


3次元画像の切り出し

 再構成された3次元画像から粒子と考えられる部分などを切り出します.切り出したdataは3次元画像のAnalysisや平均化するときに使用することができます.


実行例1
切り出したい部分のcoordinates,Widthが分かっている場合はmrcImageCenterGetを使います.


Input-TomogramSmth.png
xy-plane

Input1-TomogramSmth.png
yz-plane

Input2-TomogramSmth.png
zx-plane

Min

Max
Mean
SD

SE

-0.00136636 (75, 42, 133)

0.00292404 (94, 65, 68)
-9.48921e-07
0.00013513

8.71152e-08


コマンド: mrcImageCenterGet -i Input-TomogramSmth.mrc -o Input-TomogramSub.mrc -Cx 67 -Cy 67 -Cz 67 -Nx 27 -Ny 27 -Nz 27


Input-TomogramSub.png
xy-plane

Input1-TomogramSub.png
yz-plane

Input2-TomogramSub.png
zx-plane

Min

Max
Mean
SD

SE

-0.0012017 (5, 9, 13)

0.00263957 (13, 6, 15)
2.22923e-05
0.000388094

2.76625e-06


2次元画像の切り出し

 視野全体ではなく,一部だけ再構成するために傾斜画像から部分的に2次元画像を切り出す場合もあります.視野全体の再構成よりもコストが削減されるので,部分的なdataだけあれば十分な場合はこの手法を用います.試料を傾けながら撮影しているので,画像から切り出す位置や角度を画像によって変える必要があります.切り出すときにはmrcImageCenterGetmrcImageROI,mrcImageROIsなどを使用します.切り出し範囲を全て手動で決めるのはかなりの時間を要しますので,基準(0°)'s imageでの切り出し範囲を手動で決めると残りの切り出し位置を傾斜角度に応じて自動で計算して切り出しを行う方法をとります.

操作動画: (.mov) (.mp4)

以下の流れで3次元再構成まで行います.
傾斜画像(2D画像複数)(前処理済)

↓	切り出し範囲のSetting(Display2: 0°'s imageのみ)

0°の切り出しInformationfile(ROIInformation)

↓	各傾斜画像の切り出し範囲を計算する(現在はMakefile内で処理)

各傾斜画像の切り出しInformation

↓	画像の切り出し(mrcImageROIs)

切り出された複数's imagefile(切り出し数 × 傾斜数分)

↓	位置合わせ(mrcImageCorrelarion + Makefileの処理)

位置合わせ済みの切り出しInformation(傾斜数分)

↓	再度画像の切り出し(mrcImageROIs) (※ 切り出し画像をシフトするのではなく,切り出し位置を再Settingして切り出します)

位置合わせ済み's image(ROI)file(切り出し数 × 傾斜数分)

↓	角度InformationfileのCreate(Makefile内の処理)

角度Informationfile(切り出し数分)

↓	3次元再構成(mrc2Dto3D)

3次元画像(切り出し数分)
実行例1(1軸傾斜のサブトモグラム)
Input file's image(一部)(y-axis回転: -60° ~ 60°: 2°刻み)

Input-Tomogram2DSet1.png
-60°(p1_001.mrc)

Input1-Tomogram2DSet1.png
0°(p1_031.mrc)

Input2-Tomogram2DSet1.png
60°(p1_061.mrc)


コマンド
make all
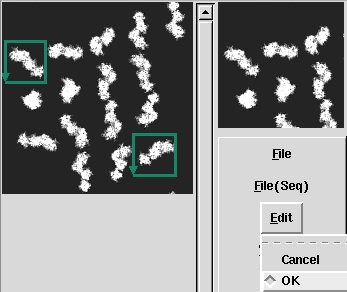
コマンドをInput後にDisplay2(2Dビューワー)が開きますので,切り出したい部分(複数可)を選択しInformationfile(.roiinfo)をCreateします.

Tomogram1.png

Tomogram2.png

切り出し部分決めてEdit->OKで決定します.

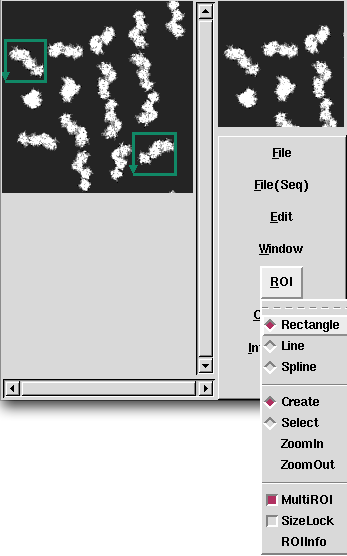
複数切り出したいときはROI->MultiROIを選択します.

Tomogram3.png

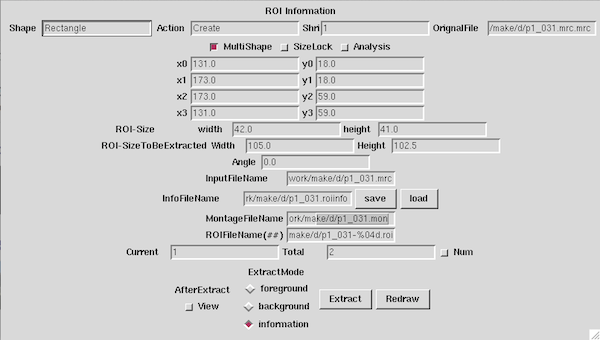
今回はInformationだけCreateすれば,切り出しは自動で行われます.

ROI InformationウィンドウにてInfoFileName右側のsaveボタンを押すとfileがCreateされます.

(またはExtractModeをInformationにしてExtractボタンを押します.)


今回OutputしたInformationfile
p1_031-0000.roi	Rect	20	30	60	30	60	70	20	70
p1_031-0001.roi	Rect	15	75	55	75	55	115	15	115
p1_031-0002.roi	Rect	25	110	65	110	65	150	25	150
p1_031-0003.roi	Rect	45	0	85	0	85	40	45	40
p1_031-0004.roi	Rect	60	50	100	50	100	90	60	90
p1_031-0005.roi	Rect	55	80	95	80	95	120	55	120
p1_031-0006.roi	Rect	55	120	95	120	95	160	55	160
p1_031-0007.roi	Rect	85	15	125	15	125	55	85	55
p1_031-0008.roi	Rect	85	51	125	51	125	91	85	91
p1_031-0009.roi	Rect	85	91	125	91	125	131	85	131
p1_031-0010.roi	Rect	93	130	133	130	133	170	93	170
p1_031-0011.roi	Rect	115	25	155	25	155	65	115	65
p1_031-0012.roi	Rect	120	60	160	60	160	100	120	100
p1_031-0013.roi	Rect	123	100	163	100	163	140	123	140
p1_031-0014.roi	Rect	115	140	155	140	155	180	115	180
p1_031-0015.roi	Rect	152	152	192	152	192	192	152	192


1枚's imageについてDisplay2からInformationfile(.roiinfo)をCreateすると,残り's imageについては傾きから切り出す範囲を計算し,自動で切り出しが行われます.


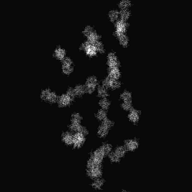
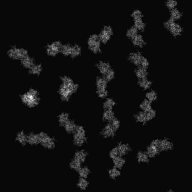
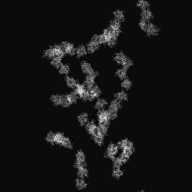
自動で切り出された画像(縦: 選択範囲毎, 横: file(角度)毎)(.pad)
Tomogram-Segmentation.png
-60°

60°


切り出し処理を終えた後はそれぞれ's imageに対して3次元再構成が行われます.


再構成されたそれぞれの3次元画像(.mrc3d)
xy-plane Outdata-Tomogram.png
yz-plane Outdata1-Tomogram.png
zx-plane Outdata2-Tomogram.png


実行例2(2軸傾斜のサブトモグラム)
 2軸で傾斜した画像から切り出し及び再構成を行ってみます.


Input file's image(一部)(x-axis, y-axis回転: -60° ~ 60°: 10°刻み)
x-axis回転

Input-Tomogram2DSet2.png
-60°

Input1-Tomogram2DSet2.png

Input2-Tomogram2DSet2.png
60°

y-axis回転

Input3-Tomogram2DSet2.png
-60°

Input4-Tomogram2DSet2.png

Input5-Tomogram2DSet2.png
60°


コマンド
make all


今回はこの領域でROIfileの切り出しを行います.
Tomogram2-Segmanetation.png
今回OutputしたInformationfile
DataA_006-0000.roi Rect        0.722314      137.147614       33.000000      106.000000       49.053597      122.636041       16.775911      153.783654
DataA_006-0001.roi Rect       15.000000       79.000000       42.000000       79.000000       42.000000      107.000000       15.000000      107.000000
DataA_006-0002.roi Rect       13.000000       39.000000       58.000000       39.000000       58.000000       64.000000       13.000000       64.000000
DataA_006-0003.roi Rect       41.000000      129.000000       84.000000      129.000000       84.000000      154.000000       41.000000      154.000000
DataA_006-0004.roi Rect       51.000000       85.000000       82.000000       85.000000       82.000000      119.000000       51.000000      119.000000
DataA_006-0005.roi Rect       47.269722       69.494676       78.455043       40.316766       95.000000       58.000000       63.814679       87.177909
DataA_006-0006.roi Rect       66.000000        4.000000       92.000000        4.000000       92.000000       44.000000       66.000000       44.000000
DataA_006-0007.roi Rect       77.597890      150.922358       95.484138      132.052220      120.886248      156.129861      103.000000      175.000000
DataA_006-0008.roi Rect       93.000000       92.000000      115.000000       92.000000      115.000000      132.000000       93.000000      132.000000
DataA_006-0009.roi Rect      100.000000       51.000000      121.000000       51.000000      121.000000       93.000000      100.000000       93.000000
DataA_006-0010.roi Rect       98.589377       19.087800      119.760822       10.100593      135.000000       46.000000      113.828555       54.987208
DataA_006-0011.roi Rect      122.000000      141.000000      146.000000      141.000000      146.000000      184.000000      122.000000      184.000000
DataA_006-0012.roi Rect      136.883039       95.213292      160.000000      104.000000      144.116961      145.786708      121.000000      137.000000
DataA_006-0013.roi Rect      127.000000       73.000000      146.061183       60.635990      169.000000       96.000000      149.938817      108.364010
DataA_006-0014.roi Rect      140.000000       22.000000      177.361289       43.286947      166.470292       62.402025      129.109004       41.115078
DataA_006-0015.roi Rect      163.000000      152.000000      183.000000      152.000000      183.000000      190.000000      163.000000      190.000000


自動で切り出された画像(縦: 選択範囲毎, 横: file(角度)毎)(.pad)

Tomogram2-Segmanetation1.png
DataA(x-axis回転)

Tomogram2-Segmanetation2.png
DataB(y-axis回転)

切り出しサイズがバラバラで分かりにくくなっていますが,いずれの傾斜軸でもROIfileが自動で切り出されています.


再構成されたそれぞれの3次元画像(.mrc3d)
xy-plane Outdata-Tomogram1.png
yz-plane Outdata1-Tomogram1.png
zx-plane Outdata2-Tomogram1.png


Interpretation of 3D Reconstruction

 また,多様な構造を含むため,3次元画像から興味あるセグメントを切り出すなどの作業が必要です.そのための支援ソフトウェアが必要です.

Averaging of Subtomograms

 セグメンテーションによって分割された3次元data同士が別方向を向いている同じ粒子であるとき,それを平均化することでミッシングエリアを補間し,より精密な3次元像にすることができます.


分割したdata1
Input-SubTomogram.png Input1-SubTomogram.png Input2-SubTomogram.png
分割したdata2(90°向きが違う)
Input-SubTomogram1.png Input1-SubTomogram2.png Input2-SubTomogram3.png
平均したdata
Output-SubTomogram1.png Output1-SubTomogram2.png Output2-SubTomogram3.png
xy-plane yz-plane zx-plane


実行例1

xy-plane Input-Mean-SubTomogram.png
yz-plane Input1-Mean-SubTomogram.png
zx-plane Input2-Mean-SubTomogram.png


3次元像を平均化する前にmrcImageAutoRotationCorrelation3Dを使って,向きを合わせます.


Reference file(Input fileの真ん中のdataを使用)

Input-TomogramSub.png
xy-plane

Input1-TomogramSub.png
yz-plane

Input2-TomogramSub.png
zx-plane

Min

Max
Mean
SD

SE

-0.0012017 (5, 9, 13)

0.00263957 (13, 6, 15)
2.22923e-05
0.000388094

2.76625e-06


コマンド: mrcImageAutoRotationCorrelation3D -i c1-1.mrc -r c2-2.mrc -fit f1-1.mrc -EA YOYS -Rot1 0 0 30 -Rot2 0 330 30 -Rot3 0 330 30 -Xrange 0 0 -Yrange 0 0 -Zrange 0 0


補正後のdata(-fitのOutput file)
xy-plane Input-Fit-SubTomogram.png
yz-plane Input1-Fit-SubTomogram.png
zx-plane Input2-Fit-SubTomogram.png


補正fileに対し,mrcImageAverageにて平均化を行います.
Output file

Outdata-TomogramSub.png
xy-plane

Outdata1-TomogramSub.png
yz-plane

Outdata2-TomogramSub.png
zx-plane

Min

Max
Mean
SD

SE

-0.000536652 (6, 13, 12)

0.00177258 (13, 17, 13)
3.22171e-05
0.000228739

1.6304e-06

平均化することにより3次元像の質(特にyz-plane)が良くなりました.


実行例2

xy-plane Outdata-Tomogram.png
yz-plane Outdata1-Tomogram.png
zx-plane Outdata2-Tomogram.png


Reference file(Input fileの先頭のdataを使用)

Input-TomogramSub1.png
xy-plane

Input1-TomogramSub1.png
yz-plane

Input2-TomogramSub1.png
zx-plane

Min

Max
Mean
SD

SE

-5.47817 (34, 19, 20)

16.0715 (31, 22, 19)
0.142234
1.22547

0.0048441


同様にまず向きを合わせます.
コマンド: mrcImageAutoRotationCorrelation3D -i p1-0001.mrc3d -r Target.mrc3dref -fit p1-0001.3dfit -EA XEYR -Rot1 0 355 5 -Rot2 0 355 5 -Rot3 0 0 30 -M 18


補正後のdata(-fitのOutput file)
xy-plane Input-Fit-SubTomogram1.png
yz-plane Input1-Fit-SubTomogram1.png
zx-plane Input2-Fit-SubTomogram1.png


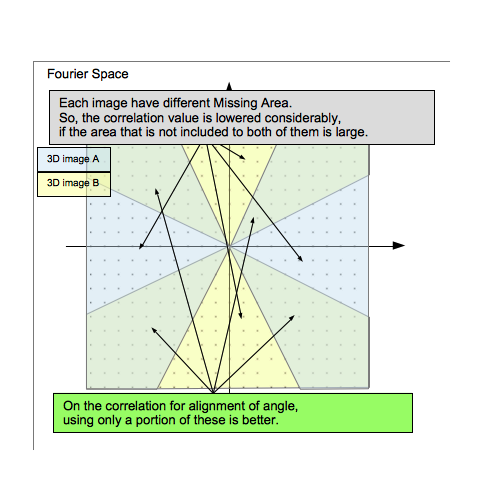
Reference fileに向きを合っているものと合っていないものがあります.
これはそれぞれのサブトモグラムの3次元像にてミッシングエリアが異なるので,どちらかにdataがない角度では相関値が大Widthに下がってしまうためです.
Fig-SubTomogram.png


補正fileに対し,mrcImageAverageにて平均化を行います.
Output file

Outdata-TomogramSub1.png
xy-plane

Outdata1-TomogramSub1.png
yz-plane

Outdata2-TomogramSub1.png
zx-plane

Min

Max
Mean
SD

SE

-2.32263 (22, 29, 20)

5.20816 (19, 24, 22)
0.0844992
0.49404

0.00195286